✓ Your Setup: Checklist
Where is everything? What do I need before each class? What sort of computing setup do I need?Answers in a handy checklist form!
✓ Starting Each Class 👩🏻🏫
Open your laptop, prepare to get hands-on! Details:- Open the Class Schedule Table, so you will have access to today's materials (LINK ↗)
- Open the MS Teams course forum, get ready for chat (LINK →)
- Start your Python application. You should have two windows: a script editor, and an interactive shell/console/terminal.
- Open your designated script folder on your laptop where you save your Python scripts.
✓ Make a Designated Folder for your Work 📁
On your laptop, create a folder where you will keep your Python scripts for this class. Suggestion: "ling1330" under your "Documents" folder. Make note of this folder's full path.- Windows people: it will be something like C:\Users\your-user-name\Documents\ling1330. It may have OneDrive before Documents.
- Mac people: it will be something like /Users/your-user-name/Documents/ling1330.
✓ Setting up your Python Working Environment 🐍
There are many modes of programming with python, many apps/IDEs, and many Python distrbutions. In this class, we will utilize the following setup:- Distribution: Anaconda Python (current python version 3.14; slightly older versions 3.13/3.12 are fine too.)
- Apps: Terminal (on Windows/Mac) and Spyder (included in Anaconda)
- Python deliverables: script files (ex. hello.py) and saved-out console sessions (ex. out.txt)
How to install Anaconda Python
- Head to https://www.anaconda.com/download. You will have to create a log-in.
- Download the graphical installer file for "Anaconda Distribution". Note: Chrome may quietly block downloading this file; if this happens, try a different browser like Edge (Windows) or Safari (Mac OS).
- Then, install. Choose "Install for All Users" option if you can. Otherwise, "Just Me" is fine.
- Note that Anaconda Python comes bundled with many popular 3rd party software libraries. It takes a while to finish installing, and it will take up a lot of space on your disk storage (5+GB).
Running Python Interpreter Shell in Terminal (Windows)
Running Python Interpreter Shell in Terminal (Mac OS)
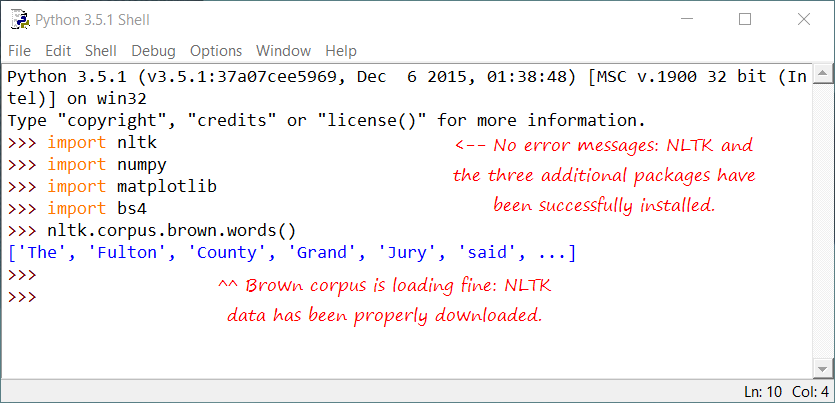
NLTK setup
Launching Spyder (Windows)
 (Windows)
Launching Spyder (Mac OS)
 (Mac)
(Mac)



✓ Other Configurations and How-To's 💻
Showing extensions (Windows)
Windows OS hides away file extensions in the file name, so you end up seeing my-notes when the true file name is my-notes.txt or my-notes.docx! To fix this, open any folder, click "View", then "Show" at the bottom, and check "File name extensions". See this screenshot.
Unactivating base virtual environment in Terminal (Mac OS, ADVANCED)
Advanced users only! After installing Anaconda Python, you will notice your Terminal window permanently displaying (base) in the prompt. This means Anaconda's "base" virtual environment (venv) is activated by default in your Terminal. If you'd rather use the "base" venv only when you need it, follow the instructions below.- Turn off conda's auto activation of base. In Termnal, run: conda config --set auto_activate_base false
- Launch a new Terminal window. (base) will now be gone from your prompt.
- From this point on, you have to manually turn on and off the "base" venv, according to your needs. To turn on, run conda activate base in Terminal. And run conda deactivate to turn off.
Taking screenshots
- Windows (see this page for explanation):
- Classic way: PrtSc or Alt + PrtSc, then Ctrl+V to paste
- New: WindowsKey + Shift + S then use Snip & Sketch app
- Mac (See this page for explanation):
- Command + Shift + 4 to capture a region or a particular window, ... + 3 for the entire Desktop