✓ Checklists
Where is everything? What do I need before each class? What sort of computing setup do I need?Answers in a handy checklist form!
✓ Starting Each Class
Open your laptop, prepare to get hands-on! Details:- Open the Class Schedule Table, so you will have access to today's materials (LINK ↗)
- Open the MS Teams course forum, get ready for chat (LINK →)
- Start your Python application into the shell environment (= IDLE).
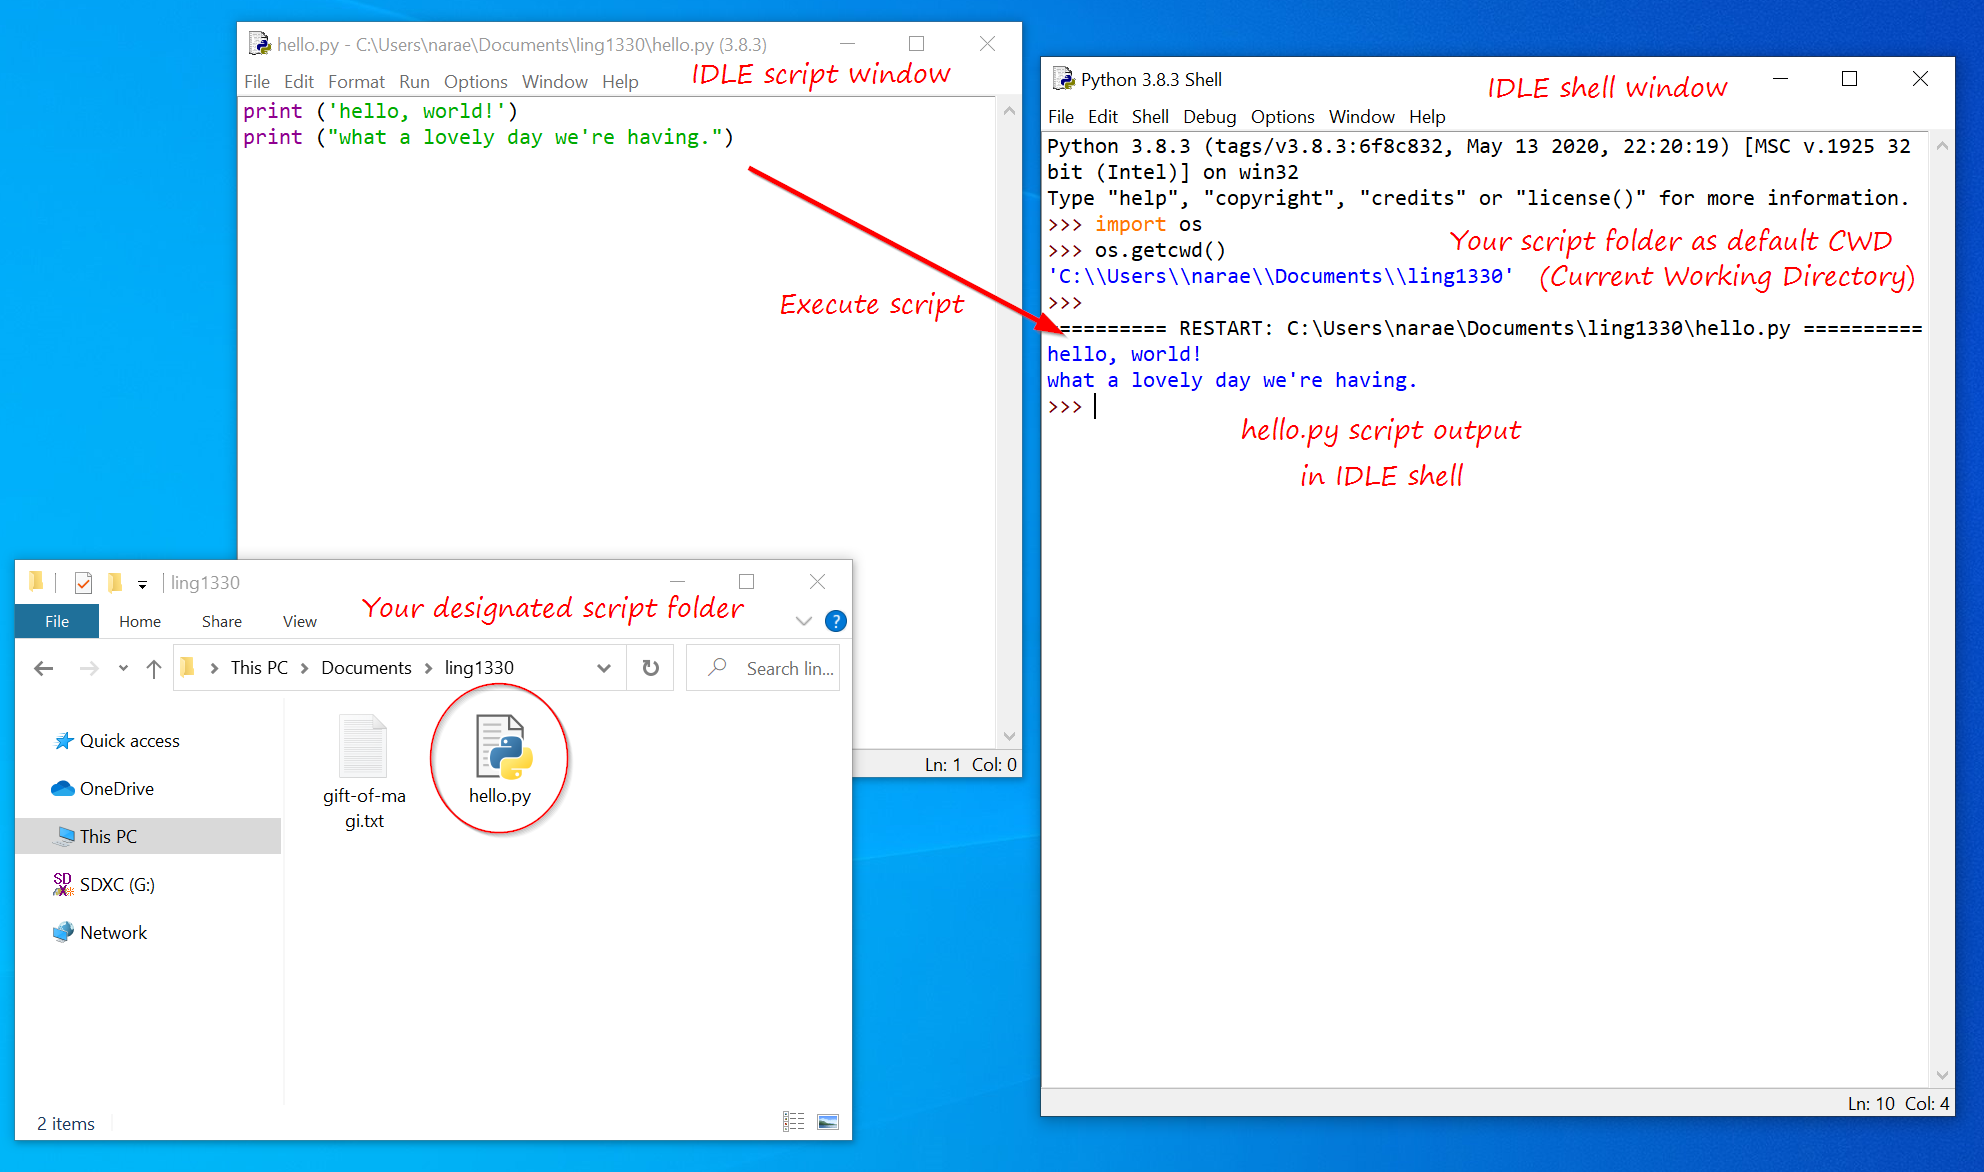
- Open your designated script folder on your laptop where you save your Python scripts.
✓ Computer/Software Setup
Python setup- No Python on your machine? Install the latest version, currently 3.12 (3.11 is fine too). I recommend the Anaconda distribution.
- Head to https://www.anaconda.com/download and follow instructions.
- Note that Anaconda Python comes bundled with many popular 3rd party software libraries, therefore it takes up a lot of space on your disk storage (around 10GB). It will likely take a LONG time to install as well.
- IDLE shell is the Python environment of choice for this class. On Anaconda Python, IDLE is somewhat buried and it takes a bit of figuring out how to access it.
- For Mac folks, it is simple: open up Terminal and type in idle &, then ENTER key. It may be idle3 instead.
- Windows folks: here's how you can create a handy shortcut. DO IT -- it's absolutely worth the trouble!
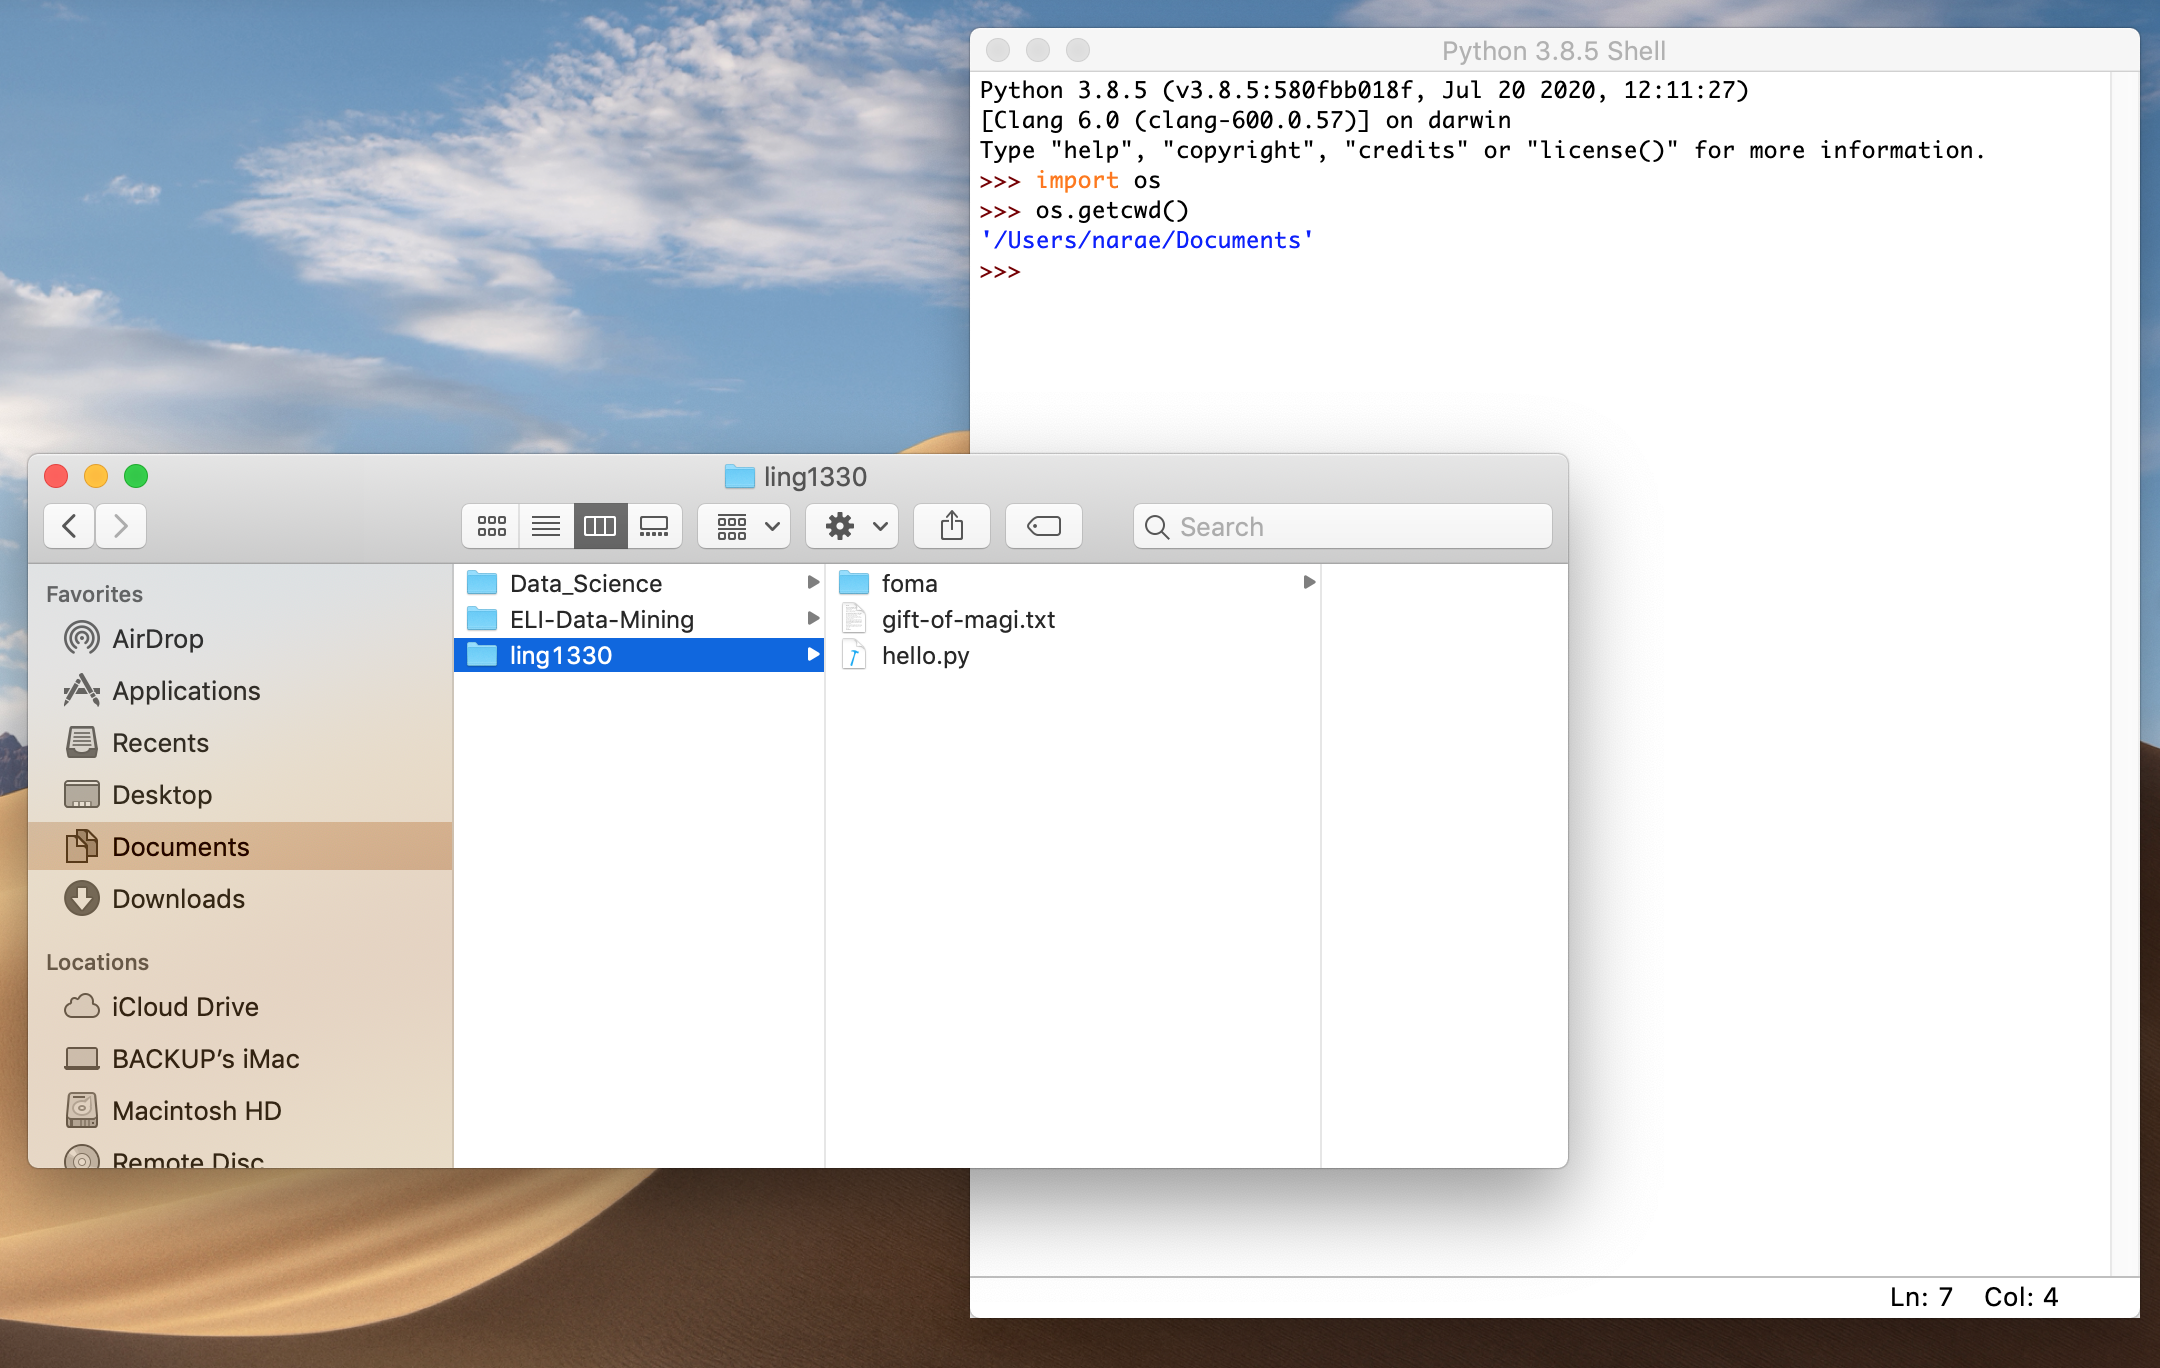
- Ultimately, your Python work environment should look like this:
 (Windows),
  (Mac OS).
- Don't want to use IDLE? Your favorite IDE might work just fine for this class, as long as it has a built-in Python shell environment. Check with me.
- On your laptop, create a class folder where you will keep your Python scripts for this class. Suggestion: "ling1330" under your Documents folder.
- Windows people: congrats, there's some additional setup you need to do. :-) Follow the instructions here. DO NOT SKIP!!
- Windows (see this page for explanation):
- Classic way: PrtSc or Alt + PrtSc, then Ctrl+V to paste
- New: Shift + WindowsKey + S then use Snip & Sketch app
- Mac (See this page for explanation):
- Command + Shift + 4 to capture a region or a particular window, ... + 3 for the entire Desktop
- Windows: Alt+P (previous command), Alt+N (next command)
- Mac: Ctrl+P (previous command), Ctrl+N (next command)
- Recommendation: remap them to ⇧ / ⇩ (UP/DOWN arrows), they are much quicker! Instructions here.
IDLE and command line, when you're stuck
- Ctrl + C to abort a mistyped command and return to clean prompt
- Install NLTK
- Anaconda users (Win/Mac): nltk is already on your system, so no need to install. Skip to the the next step to download the data pack only.
- Students using python.org distribution should install NLTK through pip. Windows instruction, Mac instruction.
- (NEW!) If you still can't import nltk after installation, see this FAQ. This happens when you have multiple Python distributions on your machine.
- Download NLTK data
- Everyone: after installing nltk, download NLTK's data pack.
- Confirm your NLTK is all set: screenshot.