Release 2.3
A58165-01
Library |
Product |
Contents |
Index |
| Oracle8 ConText Cartridge Administrator's Guide Release 2.3 A58165-01 |
|
This chapter provides details on how to administer ConText users, servers, and queues from the command-line.
The process of administering ConText can be divided into three main tasks:
Management of ConText users can be performed by any Oracle DBA user or the CTXSYS user. Management of ConText servers and queues is performed by the CTXSYS user.
If you want to use one-step queries in ConText, you must set the ConText initialization parameter TEXT_ENABLE for each database instance to TRUE. TEXT_ENABLE enables Oracle8 to recognize the CONTAINS SQL function utilized in one-step queries.
You can set TEXT_ENABLE for all users and sessions in the initsid.ora file. You can also set TEXT_ENABLE for the current session using the SQL command, ALTER SESSION.
|
See Also:
For the location of the initsid.ora file, see the Oracle8 installation documentation specific to your operating system. For more information about setting initialization parameters, see Oracle8 Server Administrator's Guide. |
To set TEXT_ENABLE for all users, perform the following steps:
text_enable=true
To set TEXT_ENABLE for the current session only, issue the following SQL command:
alter session set text_enable = true

This section provides details for performing the following user administration tasks from the command-line:
ConText provides a predefined Oracle user called CTXSYS for performing system and database administration.
To create additional Oracle users for ConText, log in to SQL*Plus as an Oracle DBA and use the SQL command CREATE USER.
For example:
create user app_dev
identified by 123abc
default tablespace app_tables;
To assign a ConText role to a user, log in to SQL*Plus as an Oracle DBA and use the SQL command GRANT. For example:
grant ctxapp to ctxdev;
|
See Also:
For more information about the ConText roles, see "ConText Roles" in Chapter 2, "Administration Concepts". For more information about granting roles to users, see Oracle8 Server SQL Reference. |
To enable users (i.e. application developers) to call procedures from within their own stored procedures and triggers, you must explicitly grant to each user EXECUTE privileges for the ConText PL/SQL packages that contain the procedures.
To grant EXECUTE privileges to users, log in to SQL*Plus as CTXSYS and use the GRANT command. For example:
grant execute on ctx_query to ctxdev;
In this example, CTXSYS grants EXECUTE privileges to the user CTXDEV for all the stored procedures in the CTX_QUERY package.
The ConText packages for which users may need EXECUTE privileges are:
If the application developer is building administration functionality into an application, they may need EXECUTE privileges on the remaining ConText packages

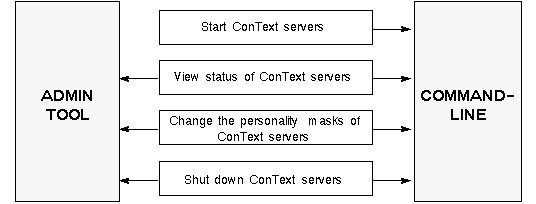
This section provides details for performing the following ConText server administration tasks from the command-line:
You can start ConText servers using a number of methods, all from the command-line:
To start a ConText server, run the ctxsrv executable from the command-line of the server machine.
For example, in a UNIX-based environment, to start a ConText server in the background with a personality mask of D (DDL) and L (Linguistics), type the following command on the command-line of the server host machine:
ctxsrv -user ctxsys/password -personality DL &
|
See Also:
For more information about ctxsrv, see "ctxsrv Executable" in Chapter 4, "ConText Server Executables and Utilities". For more information about the text operations that ConText servers can process, see "Text Operations" in Chapter 6, "Text Concepts". |
When -user is specified in the command-line for ctxsrv, the password for CTXSYS is visible to users of the machine on which the ConText server process is running.
If you wish to mask the password from users, you can run ctxsrv without specifying -user. The required user information can be supplied in two ways:
If you do not specify the -user argument, ConText prompts you to enter user information. The information must be entered in the format 'CTXSYS/password' where password is the password for CTXSYS.
The disadvantage of using this method is ConText servers cannot be run as background processes in environments that support background processes.
If your environment supports it, you can pass the required information for -user to ctxsrv through a plain text file.
The file must contain a single line of text in the format 'CTXSYS/password' where password is the password for CTXSYS.
For example, in a UNIX-based environment, the following command starts a ConText Server with the Loader (R) personality. The user information is passed to ctxsrv through a file named pword.txt.
ctxsrv -personality R < pword.txt
The advantage of using this method is ConText servers can be run as background processes in environments that support background processes. In addition, this method provides the highest level of security for masking the password.
The ctxctl utility provides a command-line interface for starting, shutting down, and viewing the status of your ConText servers.
To start the ctxctl utility, type the following command on the command-line of the server host machine:
ctxctl
Then, use the start command at the ctxctl command prompt to start ConText servers. For example, to start a single ConText server with the Loader personality, type:
command> start 1 load
|
See Also:
For more information about ctxctl, see "ctxctl Utility" in Chapter 4, "ConText Server Executables and Utilities". |
You can view the status of currently running ConText servers using ctxctl. You can also use the CTX_SERVERS or CTX_ALL_SERVERS views to monitor the status of ConText servers.
To view the status of ConText servers, start the ctxctl utility by typing the following command on the command-line of the server host machine:
ctxctl
Then, at the ctxctl command prompt, use the status command:
command> status
The status command display results similar to the following:
+-------+-------+-------+-------+-------+-------+
|  PID  | LING. | QUERY |  DDL  |  DML  |  LOAD |
+-------+-------+-------+-------+-------+-------+
| 23266 |     X |     X |       |       |       |
+-------+-------+-------+-------+-------+-------+
| 23285 |       |     X |     X |     X |       |
+=======+=======+=======+=======+=======+=======+
| Total |     1 |     2 |     1 |     1 |     0 |
+-------+-------+-------+-------+-------+-------+
To view all the currently running ConText servers using CTX_ALL_SERVERS, issue the following SQL statement:
column ser_name format a30
select ser_name, ser_status, ser_started_at
from ctx_all_servers;
If a ConText server is running, the query will display results similar to the following output:
SER_NAME             SER_STAT SER_START
-------------------- -------- ---------
DRSRV_1120           IDLE     18-MAR-97
To change the personality mask for a ConText server, use the PL/SQL procedure CTX_ADM.CHANGE_MASK.
For example:
execute ctx_adm.change_mask('DRSRV_1120','QD')
This example illustrates a personality mask consisting of the Query (Q) and DDL (D) personalities replacing the existing personality mask for the ConText server.
Also, in this example, drsrv_1120 is the name (identifier) for the ConText server. A server identifier is generated automatically when you start up a ConText server. You can use the ctxctl utility or the CTX_ALL_SERVERS view to obtain the identifier for a ConText server.
To shut down a ConText server, use CTX_ADM.SHUTDOWN.
For example:
execute ctx_adm.shutdown ('DRSRV_1120',1)
In this example, drsrv_1120 is the name (identifier) of the ConText server and the shutdown method is 1 (immediate). A server identifier is generated automatically when you start up a ConText server. You can use the ctxctl utility or the CTX_ALL_SERVERS view to obtain the identifier for a ConText server.
You can also use the ctxctl utility to shutdown ConText servers.

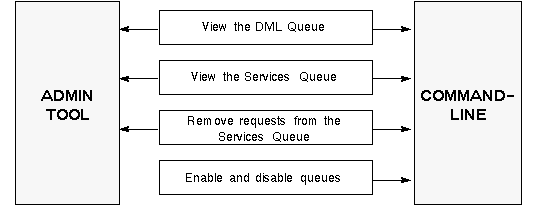
This section provides details for performing the following ConText server administration tasks from the command-line:
You can view the status of requests in the DML Queue, using the following views provided by ConText:
To view the status of requests in the Services Queue, you can use the CTX_SVC.REQUEST_STATUS function. For example:
declare status varchar2(10);
declare timestamp date;
declare errors varchar2(60);
begin
   status := ctx_svc.request_status(3341,timestamp,errors);
   dbms_output.put_line(status,timestamp,substr(errors,1,20);
end;
In this example, variables are defined for status, timestamp, and errors. Then, REQUEST_STATUS is called to return the status of the request with handle 3341 and the DBMS_OUTPUT package is used to display the results of the output.
A handle is generated automatically when a request is submitted to the Services Queue using CTX_LING.SUBMIT.
|
See Also:
For more information about submitting requests to the Services Queue and using the CTX_LING package, see Oracle8 ConText Cartridge Application Developer's Guide. For more information about the DBMS_OUTPUT package, see Oracle8 Server Application Developer's Guide. |
You can remove pending and errored requests from the Services Queue using procedures in the CTX_SVC package.
To remove a request with a status of PENDING, use the CTX_SVC.CANCEL procedure. For example:
execute ctx_svc.cancel(3341)
In this example, the request with handle 3341 is removed from the Services Queue.
In addition, you can use the CTX_SVC.CANCEL_ALL procedure to remove all requests with a status of PENDING from the Services Queue. For example:
execute ctx_svc.cancel_all
To remove a request with a status of ERROR, use the CTX_SVC.CLEAR_ERROR procedure. For example:
execute ctx_svc.clear_error(3341)
In addition, you can use the CTX_SVC.CLEAR_ALL_ERRORS procedure to remove all requests with a status of ERROR from the Services Queue. For example:
execute ctx_svc.clear_all_errors
You can also use the CLEAR_INDEX_ERRORS or CLEAR_LING_ERRORS to remove all errored indexing/Linguistics requests from the Services Queue.
You can enable or disable the following queues in the Text Request Queue:
If a queue is disabled, pending requests in the queue are not processed by ConText servers.
|
Note: A disabled queue continues to accept requests. The queues should be monitored regularly to prevent an excessive backlog of pending requests. To obtain the status of a queue, use the CTX_ADM.GET_QUEUE_STATUS function. |
|
See Also:
For more information about the Text Request Queue, see "Text Request Queue" in Chapter 2, "Administration Concepts". |
To enable a queue, use the CTX_ADM.UPDATE_QUEUE_STATUS procedure. For example:
execute ctx_adm.update_queue_status(ctx_adm.DML_QUEUE, ctx_adm.ENABLE_QUEUE)
In this example, the DML Queue is enabled, which allows entries in the queue to be processed by ConText servers.
To disable a queue, use the CTX_ADM.UPDATE_QUEUE_STATUS procedure. For example:
execute ctx_adm.update_queue_status(ctx_adm.TEXT_QUEUE, ctx_adm.DISABLE_QUEUE)
In this example, the Text Queue (DDL and Query pipes) is disabled, which prevents all text/theme queries and DDL requests from being processed by ConText servers.